
Instagram embed vs. feed widget speed: what each one loads on your page
When people ask whether Instagram content will slow down their website, the honest answer is “it depends on how you add it.” Instagram’s own Embed option and a feed widget take two very different technical routes. This article explains what each one actually downloads, why that matters for page speed, and how to measure it on your own site instead of trusting anyone’s numbers, including ours.
Updated October 12, 2026
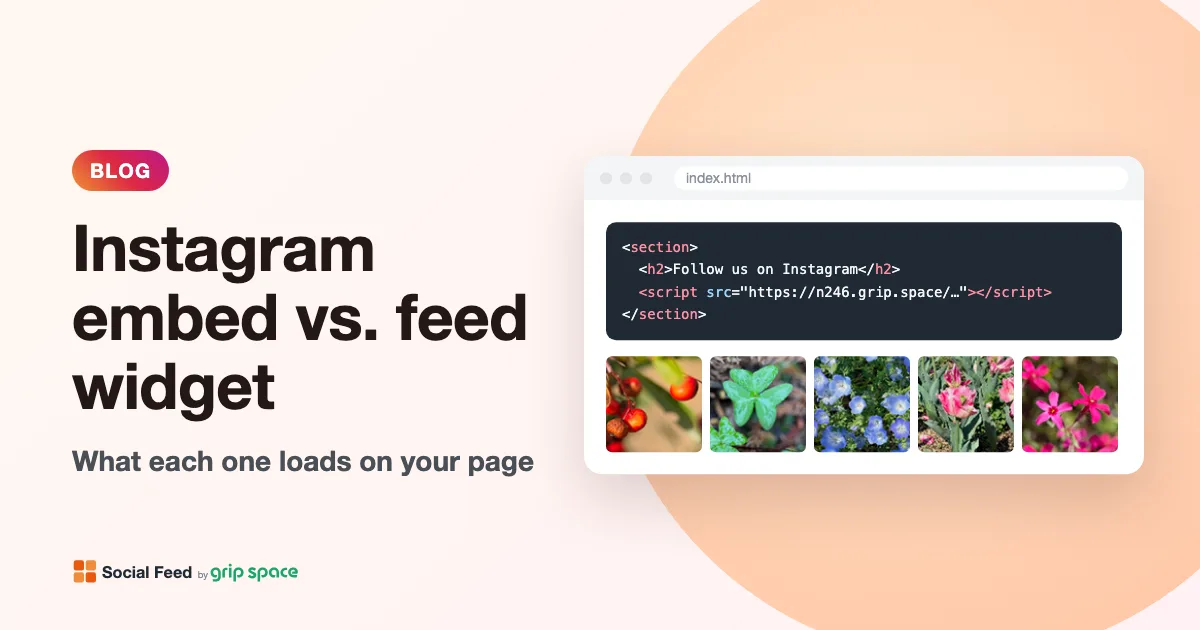
Why “which is faster” has no single answer
Page speed is not a property of a tool. It is the result of what a specific page downloads, in what order, on a specific device and connection. A single embedded post on a light page can be perfectly fine, and a feed with fifty posts in an auto-loading slider can be heavy. The reverse is also true.
So instead of quoting benchmark numbers that would not match your site anyway, this article does three things. It explains what Instagram’s native embed loads, based on Meta’s developer documentation and the embed script itself. It explains what the Social Feed by grip space widget loads, based on how it is built. And it gives you a step-by-step method to compare the two on your own page with free browser tools.
What Instagram’s native embed loads
When you click Embed on an Instagram post and copy the code, you get a block of HTML that has two parts: a <code><blockquote class="instagram-media"></code> element with a link to the post, and a script tag that loads Instagram’s <code>embed.js</code> library. Meta’s oEmbed documentation describes the flow: the embed HTML contains a reference to the embed.js library, and when the library loads, it scans the page for the post HTML and generates the fully rendered post.
If you look inside embed.js (you can open https://www.instagram.com/embed.js in a browser), you can see how that “fully rendered post” is created: the script replaces each blockquote with an <code><iframe></code> whose address is the post’s URL with <code>embed/</code> added to it (or <code>embed/captioned/</code> when the caption is included). That iframe is a separate web page served by Instagram. It brings its own HTML, styles, scripts and images.
Putting that together, a page with one embedded post typically loads:
- embed.js from instagram.com, the library that finds the blockquotes and builds the iframes.
- One iframe document per embedded post, loaded from instagram.com.
- Everything that iframe document needs: its own stylesheets, scripts, the post image or video poster, the account’s profile picture and any icons Instagram uses in the card.
Because each post is its own iframe, adding a second and third embedded post adds a second and third iframe, each with its own set of requests. The library itself only needs to be on the page once. Developers who request embed code through the oEmbed API can pass <code>omitscript=true</code> to get the HTML without the script, load embed.js once themselves and call <code>instgrm.Embeds.process()</code> after loading the library. That avoids duplicate script tags but does not remove the per-post iframes.
Meta also notes that the embedded post is responsive and adapts to the size of its container, with a height that varies depending on the container width and the length of the caption. In practice, this means the space the embed takes on your page is not known until the iframe has loaded and reported its size, which matters for layout shift (more on that below).
What the Social Feed widget loads
Social Feed by grip space takes a different route. The embed code is a single script tag:
<script type="text/javascript" src="https://n246.grip.space/api/v1/instagram/widget/xxxxxxxx"></script>That one script contains both the drawing code and the data for your posts (image addresses, captions, like counts, your settings). It builds the grid or slider directly in your page, right after the script tag, using standard HTML elements. There is no iframe and no separate stylesheet file. A page with the widget typically loads:
- The widget script, one request to our server. Its size grows with the number of posts and the length of their captions, because the captions are included for the lightbox.
- Post images, loaded directly from Instagram’s image servers. For videos and Reels, the grid shows the thumbnail image, not the video.
- Your profile picture, if the account header with the avatar is turned on.
- A tiny view-counting image (a 1×1 pixel) from our server, used for the view count shown in your dashboard and for the monthly view limit.
Videos are only loaded when a visitor opens one in the lightbox. The widget itself does not set cookies or use local storage, and the text inherits your site’s font, so no web fonts are downloaded for it.
The script is served with headers that tell the browser not to cache it. That is a deliberate trade-off: when you change a setting in the dashboard, the next page view shows the change, with no waiting for a cache to expire. The cost is that the script is downloaded on every page view. Because it is generated for your widget on request, its response time is something you should look at when you measure (see the method below).
How each approach handles images below the fold
Images are usually the heaviest part of either approach, so when they load matters as much as how many there are.
In the widget’s grid layout, the images in the first row load right away and the rest use the browser’s native <code>loading="lazy"</code> attribute, so the browser can wait until the visitor scrolls near them. In the slider layout, all images load right away. That is intentional: lazy loading tends not to keep up with horizontal swiping, and visitors would see empty tiles. If speed is your main concern and you show many posts, a grid is the lighter choice. Our post on <a href={`${BASE}/blog/instagram-feed-grid-or-slider/`}>choosing between a grid and a slider</a> covers the layout side of that decision.
For the native embed, the images live inside Instagram’s iframe, so how and when they load is decided by Instagram’s page, not by you. If you want to delay embeds that sit far down a long page, the general advice from web.dev applies: lazy loading can be used to load embedded resources only when necessary, but be careful, because it often involves extra JavaScript.
Side by side
| Instagram’s native embed | Social Feed widget | |
|---|---|---|
| Code you paste | A blockquote plus a script tag for embed.js, per post | One script tag per widget |
| Scripts loaded | embed.js, plus whatever each iframe page loads | One widget script |
| Iframes | One per embedded post | None; drawn directly in your page |
| Where images come from | Instagram, inside the iframe | Instagram’s image servers, directly in your page |
| Adding more posts | Adds another iframe with its own requests | Adds more images (and caption text in the script) |
| Lazy loading | Decided by Instagram’s embed page | Grid: first row immediately, the rest lazy. Slider: all immediately |
| Videos | Handled inside the iframe | Thumbnail in the grid; the video loads only when opened in the lightbox |
| Styling | Instagram’s card design | Columns, spacing, max width, font size; inherits your font |
| Updates when you post | No; shows the copied post | Yes (once a day on the Free plan) |
Neither column is “fast” or “slow” on its own. A single embed on a blog article is a small cost. A page with ten separate embeds loads ten iframe pages. A widget with 50 posts in a slider loads 50 images immediately. The table tells you where the weight comes from so you can make sensible choices.
Layout shift: the part people notice most
Visitors rarely notice an extra script. They do notice when the text they are reading jumps down the page. That is measured as Cumulative Layout Shift (CLS), one of Google’s Core Web Vitals.
Both approaches can cause it. The native embed starts as a blockquote, gets replaced by an iframe, and then the iframe grows to its final height once the post and caption have loaded. Any content below it moves each time.
The widget inserts the whole feed when the script runs. Each tile is a square with a placeholder background, so the grid does not jump again as individual images arrive, but the feed as a whole still pushes down whatever comes after it when it first appears.
The fixes are the same for both:
- Place it below your main content. A feed or embed in the lower half of the page or the footer shifts content that most visitors have not reached yet. See where to put an Instagram feed on your website.
- Reserve space. Wrap the code in a container with a
min-heightclose to the final height of the feed or post on mobile and desktop. Measure the real height once and set it. - Keep the number of posts reasonable. Fewer tiles mean a shorter, more predictable block.
<div style="min-height: 420px;">
  <!-- paste the widget or embed code here -->
</div>
The number above is only an example. Set it from what you measure on your own page, and check the result on a phone, where the height is usually different.
How to measure it yourself
The most reliable comparison is one you run on your own site. You do not need special software, only Chrome (or another Chromium-based browser) and a free online test. Here is a simple method that gives you a fair comparison.
Step 1: Prepare three test pages
- Baseline: a copy of the page without any Instagram content.
- Native embed: the same page with the Instagram embed code for the posts you would actually show.
- Widget: the same page with the widget code, set to the layout and number of posts you would actually use.
Use realistic settings. Comparing one embedded post with a 30-post feed tells you nothing useful. If you would show six posts either way, embed six posts and set the widget to six. Most site builders let you create an unlisted or hidden test page for this; publish it, because many editors do not run scripts while you are editing.
Step 2: Look at the Network panel
- Open the test page in Chrome, then open DevTools (right-click the page and choose Inspect).
- Click the Network tab.
- Check the Disable cache checkbox. Chrome’s documentation recommends it to emulate how a first-time visitor experiences your site, which is the fairest comparison. Then reload the page.
- Note the total number of requests, which Chrome lists in the status bar at the bottom of the Network panel, and the Size column, which shows the amount transferred for each resource. Compare them across the three pages.
- Type
instagramorgrip.spaceinto the Filter box to see only the requests that belong to the Instagram content. For the native embed, you will see embed.js and the iframe pages. For the widget, you will see the widget script and the image requests.
Click the widget script or embed.js and open its <strong>Timing</strong> tab to see the timing breakdown of that request, including how long the server took to respond and how long the download took. This is the honest answer to “how long does the script take for me”, on your connection, today.
Step 3: Test on a slow connection
Most visitors are on phones, often on mobile networks. In the Network panel, open the throttling menu (it says No throttling by default) and pick a slower preset, then reload. Watch where the Instagram content appears relative to the rest of the page. If the main content appears quickly and the feed fills in afterwards, that is a good result.
Step 4: Run PageSpeed Insights
Publish the test pages and run each through PageSpeed Insights. Two things to know when you read the results:
- Lab data vs. field data. Google explains that lab data is collected in a controlled environment and is useful for debugging, while field data comes from real Chrome users through the Chrome User Experience Report. A new test page with little traffic will usually show only lab data.
- Mobile is simulated. According to Google, Lighthouse simulates the page load conditions of a mid-tier mobile device on a mobile network. Mobile scores are usually lower than desktop scores, which is expected.
Run each page several times. Scores move from run to run, so compare the typical result, not the best or worst one. Pay attention to the specific audits (for example, third-party code, network payloads and layout shift elements) rather than only the overall score; they tell you which requests are responsible.
Step 5: Block the content to see its real cost
Chrome DevTools can block individual requests, so you can see how your page behaves when a specific script is not available. web.dev recommends this as a way to identify the impact of third-party code. Open the <strong>Network request blocking</strong> tab in the DevTools drawer, add a pattern for embed.js or the widget script, and reload. The difference between the blocked and unblocked load is the cost of that piece of Instagram content on that page.
What to look for in the results
| What you see | What it usually means | What to try |
|---|---|---|
| Many requests from instagram.com | Several native embeds, each with its own iframe page | Fewer embeds, or a single feed instead of many separate posts |
| Many image requests at page load | A slider, or a grid where many images load right away | Use a grid, reduce the number of posts, or move the feed lower |
| A slow response for one script | Server response time for that script on that test | Run the test again at another time; report consistent slowness to the provider |
| Large layout shift near the Instagram content | Content below is pushed down when it appears | Reserve space with min-height, move it below the main content |
| Largest Contentful Paint is an Instagram image | The Instagram content is the biggest thing near the top of the page | Move it down so your own hero image or heading is the main element |
| Scores barely change between baseline and test page | The Instagram content is not a major cost on this page | Nothing to fix; focus on other parts of the page |
Practical tips for either approach
- Show fewer posts than you think you need. Six to twelve recent posts are usually enough to show that a business is active. More posts mean more images.
- Do not put Instagram content at the very top. Your own headline, hero image and call to action should be the first things to load.
- One feed is lighter than many single embeds. If a page shows several posts, a feed avoids loading one iframe page per post.
- Use a grid for long lists. In the widget, only the first row loads immediately in a grid. In a slider, every image loads immediately.
- Keep only one copy of the code per spot. A widget pasted twice (for example in a template and again in the page) loads twice.
- Use the published/unpublished toggle for tests. If you want to compare a page with and without the feed without touching the site’s code, unpublishing the widget makes the script draw nothing. See how to hide your feed without removing the code.
- Check the footer if you use it site-wide. A feed in a shared footer loads on every page, so measure a few page types, not only the homepage.
Things that are not about speed but still matter
Speed is only one part of the decision. A few other differences tend to matter just as much:
- Freshness. A native embed always shows the post you copied. A feed shows your latest posts automatically (once a day on the Free plan).
- Whose content. The native embed works for any public post whose owner allows embedding. The widget shows only your own connected professional account.
- Design. The native embed uses Instagram’s card. The widget lets you set columns, spacing, width and font size and inherits your site’s font.
- Privacy and consent. The native embed runs Instagram’s page inside an iframe on your site. The widget runs one script from our server and loads images from Instagram’s servers; it does not set cookies or use local storage itself. Either way, review your consent tool and privacy policy for what your site needs.
- Search. Neither approach is likely to change your rankings much. Our article on whether an Instagram feed helps SEO explains why.
Frequently asked questions
Does Instagram’s native embed use an iframe? Yes. The embed code itself is a blockquote and a script, but the embed.js script replaces the blockquote with an iframe that loads the post from instagram.com. You can confirm this by inspecting an embedded post in your browser’s DevTools.
Does the Social Feed widget use an iframe? No. It draws the feed directly in your page, right after the script tag, so it uses your page’s width and inherits your font.
Is one approach always faster? No. A single native embed can be lighter than a large feed, and one feed can be lighter than many native embeds. Measure your own page with realistic settings.
Why does the widget script download on every page view? It is sent with no-cache headers so that changes you make in the dashboard appear right away on your site. The images themselves come from Instagram’s servers.
Can I add async or defer to the widget script? The widget draws itself right after its own script tag. We recommend using the code exactly as provided and placing it where the feed should appear, below your main content, rather than editing the tag.
Will a feed hurt my Core Web Vitals? It adds images and one script, so it has some effect. Placed below the main content, with space reserved and a moderate number of posts, the effect is usually small. Test before and after with PageSpeed Insights.
My page got slower after adding Instagram content. What should I check first? Count the posts, check whether you use a slider, check whether the code appears twice, and see whether the content is near the top of the page. Then compare with the baseline page using the steps above.
Try it on your own site
The fairest way to decide is to test. The Free plan includes one widget with up to 16 posts and 3,000 views a month, which is enough to set up a test page and compare it with a native embed using the steps above. See pricing for the Light and Standard plans, read our HTML installation guide for where to paste the code, or create a free account to start.
Sources
- Meta for Developers, “oEmbed” (Instagram Platform): https://developers.facebook.com/docs/instagram-platform/oembed
- Meta for Developers, “Instagram oEmbed” (Graph API reference): https://developers.facebook.com/docs/graph-api/reference/instagram-oembed/
- Instagram embed library: https://www.instagram.com/embed.js
- web.dev, “Loading third-party JavaScript”: https://web.dev/articles/optimizing-content-efficiency-loading-third-party-javascript
- Chrome for Developers, “Inspect network activity”: https://developer.chrome.com/docs/devtools/network
- Chrome for Developers, “Network features reference”: https://developer.chrome.com/docs/devtools/network/reference
- Google for Developers, “About PageSpeed Insights”: https://developers.google.com/speed/docs/insights/v5/about
Get your embed code in a few minutes. The Free plan needs no credit card.
Sign up freeMore articles
How to add an Instagram feed to Carrd
Add an auto-updating Instagram feed to a Carrd site with the Embed element (Pro Standard or higher): steps, layout tips, sections, columns and fixes.
Read the article →
How to show only Instagram Reels on your website
Set up a Reels-only Instagram feed on your website: the Reels filter, how videos play, layout tips, and why some Reels show as still images.
Read the article →
How to show only recent Instagram posts on your website
Keep your website’s Instagram feed current: show only posts from the last 30 days, 90 days or year, how the date range is measured, and seasonal tips.
Read the article →
How to show different Instagram feeds on different pages of one website
Run several Instagram feeds on one website: one widget per page, Duplicate to copy settings, per-page filters, plan widget limits and how views are counted.
Read the article →
How to hide your website’s Instagram feed temporarily without removing the code
Switch your Instagram feed off for a closure, rebrand or account cleanup, then back on later, without touching the embed code on your website.
Read the article →
How to add an Instagram follow button to your website
Add an Instagram Follow button to your website with your feed’s header, change its text and color, and use Instagram’s own profile link and QR code.
Read the article →