
How to show different Instagram feeds on different pages of one website
One Instagram feed copied onto every page of a website gets repetitive fast. Your homepage, product pages, events page and footer each have a different job, and the same twelve posts in the same grid do not suit all of them. The fix is to run several feeds from the same Instagram account, each with its own layout and its own filters, and put each one on the page it was made for. This guide shows how to set up multiple Instagram feeds on one website with Social Feed by grip space: how widgets relate to your account, how to plan them, how Duplicate saves time, what each plan allows, and how views add up when you have more than one feed.
Updated October 12, 2026
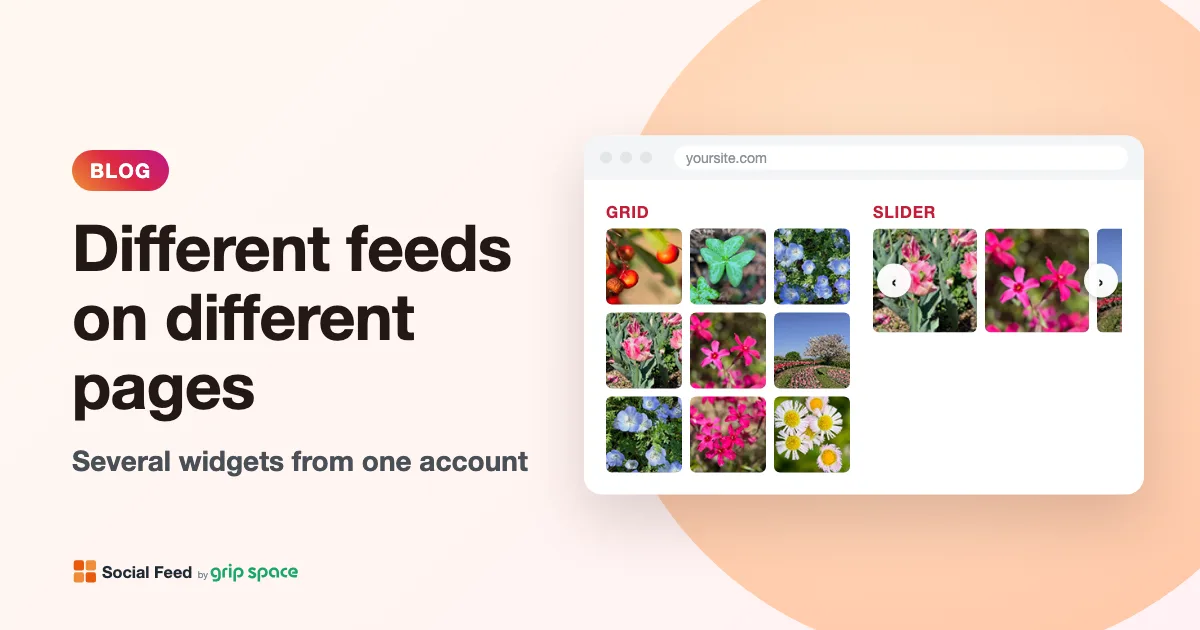
The short answer
In Social Feed by grip space, a feed on your website is a widget. One connected Instagram account can have several widgets. Each widget has its own embed code, its own settings and its own filters. To show different feeds on different pages, set up one widget completely, use Duplicate to copy it, change what should differ in the copy, and paste each widget’s embed code on its own page.
How many widgets you can create depends on your plan: one on Free, three on Light and an unlimited number on Standard. Views from all your widgets are added together for the plan’s monthly view limit.
Account vs widget: what belongs where
It helps to know which settings belong to the Instagram connection and which belong to each widget, because only the second group can differ between pages.
| Belongs to the connected account (shared) | Belongs to each widget (can differ per page) |
|---|---|
| The Instagram connection itself | Widget name |
| Your posts, profile picture and username | Layout (grid or slider), columns, number of posts, spacing, max width, font size |
| Your account’s total post count shown in the header | Click action (lightbox, open Instagram, do nothing) and hover icon |
| How often new posts are fetched (set by your plan) | What the lightbox shows: caption, like count, all carousel images or the first one |
| Account header on or off, Follow button label, color and margin | |
| Filters: video posts, Reels, carousel posts, date range, caption keywords | |
| Published or Unpublished, the embed code, and the view count |
So every widget shows posts from the same account, but each can show a different selection of them, in a different layout, with different click behavior. That is enough for almost any “different feed on each page” plan.
How many widgets each plan allows
| Free | Light | Standard | |
|---|---|---|---|
| Price | $0 | $8/month or $80/year | $24/month or $240/year |
| Widgets | 1 | 3 | Unlimited |
| Posts per widget | Up to 16 | Up to 30 | Up to 50 |
| Views per month (all widgets together) | 3,000 | 30,000 | Unlimited |
| New posts reach your site | Once a day | On each page load | On each page load |
| “Powered by Social Feed” credit | Always shown | Optional | Optional |
The widget limit counts all widgets in your account. If you have reached it, the + Add widget and Duplicate actions will tell you that you are at your plan’s limit. On the Free plan the single widget can still go on several pages, as explained below, but it will look the same everywhere. Current prices are always on the pricing section, and the Free plan is covered in detail in what the free Instagram feed widget includes.
Step 1: plan your widgets before you create them
A few minutes of planning avoids a pile of near-identical widgets with names you cannot tell apart. Write down each page that should have a feed, what that page needs from it, and whether an existing widget could serve it unchanged.
| Page | What the feed should do | Widget settings |
|---|---|---|
| Homepage | Show the brand is active, without old announcements | Grid, 8 posts, Last 90 days, exclude “closed, hiring” |
| Product or service page | Show that product or service in use | Grid, 6 posts, caption keyword “#acmeshoes” only |
| Events page | Show recent and upcoming events | Slider, 10 posts, keyword “#acmeevents”, Last year |
| About page | Show the team and the place | Grid, 4 posts, keyword “#acmeteam” |
| Footer (every page) | Small, quiet link to Instagram | Grid, 6 posts, 6 columns, header off, click opens Instagram |
That example needs five widgets, which means the Standard plan. On Light you would pick the three that matter most. Where each placement works best, and where to avoid a feed, is covered in where to put an Instagram feed on your website.
Two questions narrow the list down quickly. Does this page need a different selection of posts, or just a different size? And would a visitor notice if two pages shared the same feed? If the answer to both is no, reuse a widget.
Making the most of a limited number of widgets
Unlimited widgets are convenient, but most small sites do well with fewer. Here is how to spend a small allowance.
On the Free plan (one widget). Choose the one placement where a feed does the most work, usually a lower section of the homepage. If you also want it in the footer, use the same code in both places, but keep in mind that every page view with the footer feed counts toward 3,000 views a month. Filters still help: a date range or an exclude list keeps the single feed suitable for every page it appears on.
On the Light plan (three widgets). A common split is one general widget for the homepage and footer, one filtered widget for your most important product, service or event page, and one spare for a seasonal page or a campaign. When the campaign ends, change the spare widget’s filters for the next one rather than creating a new widget, and the embed code on your site keeps working.
On the Standard plan (unlimited widgets). The limit is no longer the number of widgets but your ability to keep them organized and your captions consistent. Agencies and businesses with many product or location pages benefit most here. The naming tips further down matter more as the list grows.
Whatever the plan, reusing one widget on several pages that need the same feed costs nothing extra in widgets. Only pages that need a different selection or a different look need a widget of their own.
Step 2: build the first widget completely
Start with the widget whose design you like most, usually the homepage one, and finish all of its shared design choices before copying it: spacing, font size, Follow button label and color, click and hover behavior, and what the lightbox shows. Every copy starts from these values, so fixing them once saves you editing each widget later.
- In the dashboard, open the widget and choose Settings & preview.
- Give it a clear name in Widget name, for example “Homepage”.
- Set the layout, columns, number of posts and the design options.
- Set the filters this page needs.
- Save, then copy the embed code and paste it on the page. The platform guides cover the pasting step: WordPress, Shopify, Wix, Squarespace, Webflow and HTML.
Step 3: Duplicate, then change only what differs
On the widget list, each widget card has a Duplicate button. Duplicate creates a new widget for the same Instagram account with a copy of the original’s settings.
| Copied to the new widget | Not copied |
|---|---|
| Layout, columns, number of posts, spacing, max width, font size | The widget name (the copy starts with your account’s username as its name) |
| Click, hover and lightbox options | The embed code (the copy gets a new one of its own) |
| Account header and Follow button settings | View history (the copy starts at zero views) |
| All filters, including caption keywords and date range | |
| Published or Unpublished state, and the credit setting on paid plans |
Because the copy keeps the original’s filters and starts with a generic name, make these your first three edits every time:
- Rename it after the page it will live on.
- Change the filters or layout that make this page different. If you forget, the new page shows exactly the same feed as the original.
- Copy its own embed code, not the original’s, and paste it on the new page.
You can also start a widget from scratch with + Add widget, which uses the default settings instead of copying. That is useful when the new feed should look nothing like the others.
Per-page filter recipes
Filters are what make a page’s feed feel made for that page. These are common combinations; swap in your own tags and numbers.
| Page | Filters | Layout |
|---|---|---|
| Homepage | Date range Last 90 days; exclude keywords for announcements | Grid, 2 rows |
| Product page | Only matching posts with that product’s tag | Grid, 1 or 2 rows |
| Reels showcase | Video posts on, Reels only | Slider |
| Photo gallery | Video posts off | Grid, more posts |
| News or “this month” | Date range Last 30 days | Grid or slider with few posts |
| Location page for one branch | Only matching posts with the branch tag | Grid |
| Footer | None, or exclude announcements | One row, header off |
How caption keywords match is explained in detail in how to filter an Instagram feed by keyword. The date range is covered in how to show only recent Instagram posts, and Reels in how to show Instagram Reels on your website.
Filtered widgets need captions that match. Before you create a widget for a tag, check that enough recent posts use it. A product-page widget filtered on a tag that appears in two posts will show two posts.
One widget on several pages
You do not need a separate widget for every page. The same embed code can be pasted on as many pages as you like, and it shows the same feed everywhere. This is the right choice when the feed really should be identical, such as a footer or a sidebar that appears site-wide.
Most website builders let you put code in a shared area, such as a footer, a global section or a theme template, so you paste it once and it appears on every page. Use that rather than pasting the same code into dozens of pages by hand; if you later want to remove it, there is one place to change.
Changes to a widget’s settings apply everywhere its code is used, the next time each page loads. You never need to paste the code again after editing settings.
Two or more widgets on the same page
You can also place several widgets on one page, for example a grid of room photos and a slider of event posts on a hotel page. Each embed code draws its feed right where it is pasted, so put each one in the section where it belongs. They work independently: different layouts, filters and click actions on the same page are fine.
A few practical points:
- Give each one a heading on your page, such as “Our rooms” and “Upcoming events”, so visitors know why there are two feeds.
- Make sure their filters do not overlap too much, or visitors see the same posts twice.
- Watch the page weight on phones. Two 12-post grids load 24 images. Fewer posts per widget is usually better.
- Avoid a site-wide footer widget on a page that already has a similar feed in the middle. Either filter them differently or leave the footer feed off that page if your platform allows it.
A worked example of several feeds on one page is in Instagram feeds for hotel and B&B websites.
How views add up with several widgets
Each widget counts a view every time it is displayed on a page. That has a few consequences worth knowing before you add more feeds.
| Situation | Views counted |
|---|---|
| One visitor opens a page with one widget | 1 |
| One visitor opens a page with two widgets | 2, one for each widget |
| A site-wide footer widget, visitor views 5 pages | 5 |
| A visitor reloads the page | 1 more per widget on the page |
| Requests identified as bots or crawlers | Not counted |
| A widget switched to Unpublished | Not counted, because nothing is displayed |
On Free and Light, the monthly view limit applies to all of your widgets together, not to each widget. A footer widget on every page usually uses the most views, because it is displayed on every page someone visits. If you are close to your limit, a footer feed is the first thing to reconsider.
The widget list shows each widget’s views over the last 30 days with a chart, and the top of the list shows this month’s total against your plan’s limit. That makes it easy to see which page’s feed is actually being seen and which one is using up your allowance.
If you go over the limit, your widgets keep showing until the end of that month. If you go over it two months in a row, they stop showing from the following month, and views keep being counted while they are stopped. Changing to a plan with a higher limit shows them again right away. Standard has no view limit.
Several Instagram accounts
If your business has more than one Instagram account, for example one per location or one per brand, you can connect each account and create widgets for each. Every widget shows posts from exactly one account; there is no way to mix two accounts in one feed. Widgets for all of your accounts count toward the same widget limit, and their views count toward the same monthly total.
If what you really have is one account with posts for several locations, you do not need extra accounts. Tag each location’s posts in the caption and create one filtered widget per location page.
Keeping several widgets organized
- Name widgets after pages, not designs. “Events page” tells you where the code is pasted; “Slider 2” does not.
- Keep a short list of which widget is on which page, especially if several people edit the website.
- Use Unpublished for seasonal feeds. Switching a widget to Unpublished makes its embed code show nothing, without removing the code from your site. Switch it back when you need it again.
- Delete only widgets you no longer use anywhere. Deleting a widget cannot be undone. Its embed code stops showing anything on every page where it is pasted, and a new widget gets a different code. Your Instagram connection is not affected.
- Do not disconnect the account to clean up. Disconnecting an Instagram account also deletes the settings of its widgets. To remove one feed, delete just that widget.
- Review every few months. Check each widget’s view count. A widget nobody sees might not need its own page, and a tag-filtered widget that has run out of recent posts needs fresh tags.
Troubleshooting
Two pages show the same feed. Either the same embed code was pasted on both pages, or a duplicated widget still has the original’s filters. Compare the code on each page with the code shown on each widget card, then check the copy’s filters.
I cannot add or duplicate a widget. You have reached your plan’s widget limit. Delete a widget you no longer use or change plans.
A new widget shows nothing. Check whether it is Unpublished: Duplicate copies the original’s Published or Unpublished state. Then check its filters in the preview. If the preview is fine but the page is empty, see Instagram feed not showing on your website.
I changed a widget but the page did not change. You may have edited a different widget than the one on that page. Check the names and codes. On the Free plan, new Instagram posts appear once a day, but settings changes appear on the next page load.
Views are higher than my visitor numbers. Views count widget displays, not people. A visitor who opens five pages with a footer widget counts five views, and a page with two widgets counts two per visit.
Frequently asked questions
Do I need to connect Instagram again for each widget? No. Widgets are created under an account that is already connected.
Can different widgets show different post counts? Yes, up to your plan’s posts-per-widget limit for each widget.
If I change a filter on one widget, do the others change? No. Settings belong to each widget. Duplicate copies settings once, at the moment you duplicate; after that the widgets are independent.
Can I show the same widget on two different websites? The embed code is a script tag that works on any page that allows it, so yes. Its views count toward the same monthly total either way.
Does each widget refresh separately? On paid plans, each widget fetches your posts every time it loads. On the Free plan you only have one widget, and it updates once a day.
Can one widget show posts from two accounts, or a hashtag? No. Each widget shows one account’s own posts. Hashtag feeds and posts from other accounts are not offered.
Getting started
- Create a Social Feed account and connect your Instagram professional account. If it is a personal account, see the guide to professional accounts first.
- Write down which pages need a feed and how each should differ.
- Build one widget completely and name it after its page.
- Duplicate it for each other page, rename it, change its filters or layout, and paste its own embed code.
- After a week or two, check the view counts and adjust.
For layout choices, see grid or slider.
Sources
- Meta for Developers, “IG User Media” reference (an account’s media and what the endpoint returns): https://developers.facebook.com/docs/instagram-platform/instagram-graph-api/reference/ig-user/media
Get your embed code in a few minutes. The Free plan needs no credit card.
Sign up freeMore articles
How to hide your website’s Instagram feed temporarily without removing the code
Switch your Instagram feed off for a closure, rebrand or account cleanup, then back on later, without touching the embed code on your website.
Read the article →
How to add an Instagram follow button to your website
Add an Instagram Follow button to your website with your feed’s header, change its text and color, and use Instagram’s own profile link and QR code.
Read the article →
How to add an Instagram feed to your website footer
Put your Instagram feed in the footer of every page: settings for narrow footer columns, slider vs grid, site-wide steps per platform, and how views add up.
Read the article →
How Instagram carousel posts appear on your website
How carousel posts show in an Instagram feed on your site: the first-image tile, the carousel mark, browsing all images in the lightbox, and hiding carousels.
Read the article →
Showing Instagram videos and Reels on your website: what to expect
How Instagram videos and Reels look in a website feed: cover-image tiles, muted playback in a lightbox, the video setting, and why some videos show as stills.
Read the article →
Lightbox or link to Instagram? Choosing what happens when visitors click a post
Should clicks on your website’s Instagram feed open a lightbox, open Instagram or do nothing? How each option works, what the lightbox shows, and when to use which.
Read the article →